Getting started with CPQ DevKit™ for Oracle in VS Code
CPQ DevKit™ for Oracle is a Visual Studio Code extension that streamlines Oracle® CPQ Cloud (BigMachines) development with a clean local project structure, better BML/BMQL editing, and one‑click sync commands.
Prerequisites
- VS Code and the extension installed (
CPQConsultant.cpq-devkit-o) - An Oracle CPQ Cloud user that can call REST APIs (commonly:
FullAdmin+User Administrator+All Accessgroup) - A new empty folder for your project (Git repo recommended)
1) Run the project scaffolding
- Open your project folder in VS Code.
- Open the Command Palette (
Cmd/Ctrl+Shift+P) and runCPQ DevKit™ for Oracle: Setup Project.
This command ensures:
project.config.jsoncexists (project-wide folder + file conventions).cpqdevkit/developer.config.jsoncexists (your local credentials; keep it out of Git)- Workspace folders exist (tables, files, functions, assets, etc., based on
project.config.jsonc) .gitignorecontains.cpqdevkit/**.vscode/extensions.jsonrecommends the extension to teammates
You can also access many DevKit commands by right-clicking your workspace folder in the Explorer.
2) Configure environments
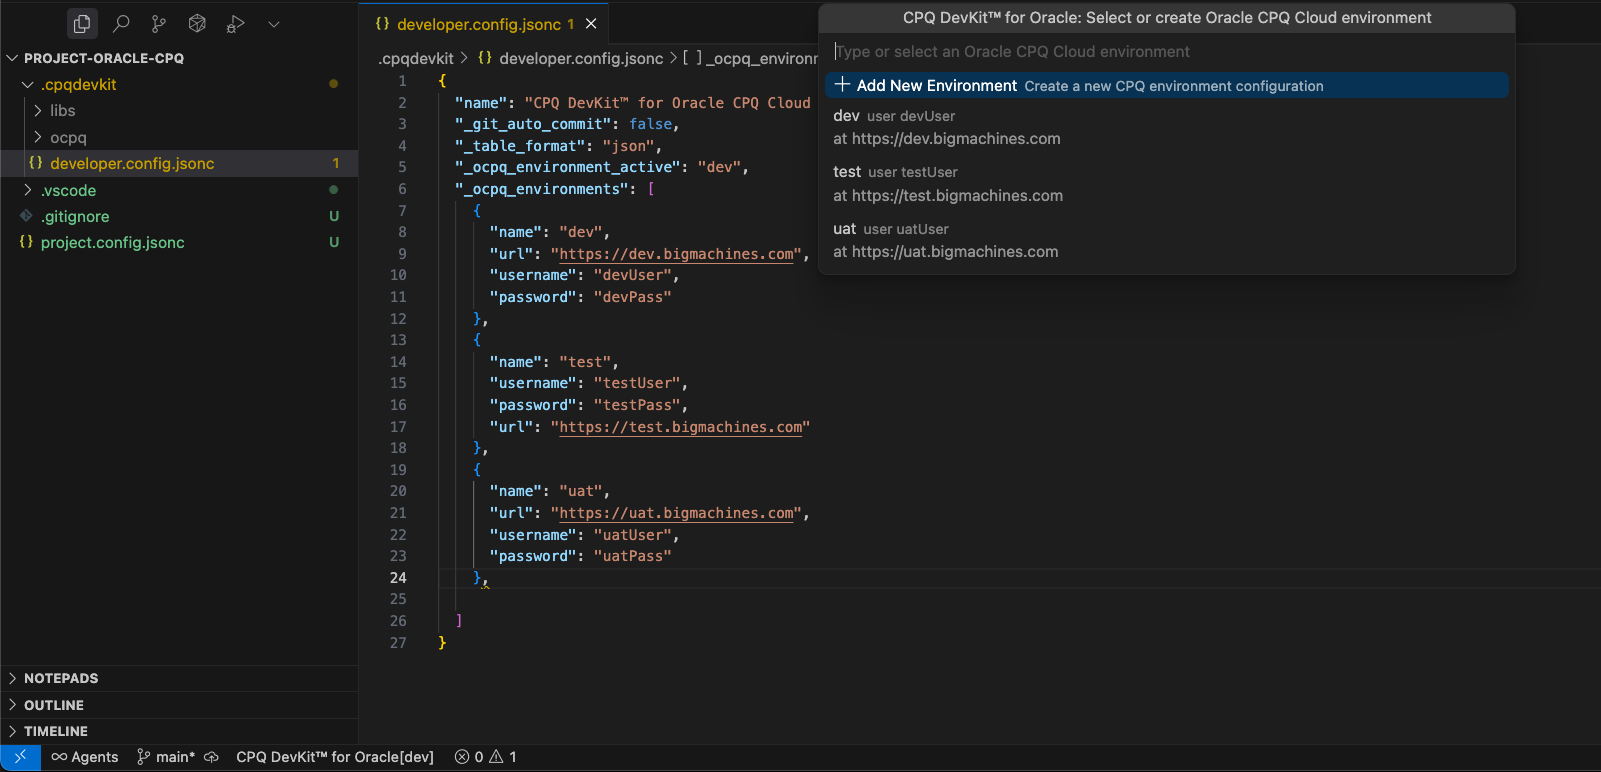
Open .cpqdevkit/developer.config.jsonc and add your environments:
Then run CPQ DevKit™ for Oracle: Change Environment to select the active environment.
3) (Optional) Log in to CPQ DevKit™
If you use CPQ DevKit services (like AI completions), run Login to CPQ DevKit™. This is separate from your Oracle CPQ credentials.
4) Your first sync
Start by pulling the essentials into your local folders:
CPQ DevKit™ for Oracle: GET ALL BMLCPQ DevKit™ for Oracle: GET ALL TablesCPQ DevKit™ for Oracle: GET ALL Files
After that, your Oracle CPQ assets live locally, so you can search, diff, and review changes like any other codebase.